
3D scanning a Jaguar E-type
Following on from last year’s blog post 'How does Agora create such accurate models?' where we explained in detail how our cars are photographed and scanned to create a 3D model, we can now reveal that the model we were scanning at that time was an original full-size model for our 1961 Jaguar E-type.
Here’s a reminder of how cutting edge technology, more commonly used for aerospace and medical applications, is used to achieve pinpoint accuracy for your model.
To say that we were excited to be part of this process is rather like saying that Jaguar were pretty good at racing. We felt thrilled and honoured to be guests of Jaguar for the day, enjoying a rare and privileged opportunity to see some exquisite museum pieces produced over Jaguars 86-year history! For our visit, not only did we get to see our model begin at the very earliest stage, but for us, this was no ordinary model. The E-type lives up to every word of its 1961 sensational press-headlines. It is stunning! It is particularly stunning in its roadster version, in red. Why? Because you get to see the dashboard, and the flicky switches, and imagine whether the bucket seats might be comfortable – or not. And you can put yourself in the drivers seat, and imagine …
But back to the reality of the workshop…
The beautiful Series 1 E-type Roadster we had the pleasure of for one day is owned by Jaguar Classics and stored in the West Midlands. This immaculate car was ideal for us to use as the basis for the model we were developing. It was the the precise model we had in mind, and even the same colour. To ensure we produced our 1:8 model as accurately as possible, we hired industry experts Physical Digital to meet us at Jaguar with their state-of-the-art 3D scanning technology (cameras, projectors and software).
As you can imagine it takes a while to get properly set up, making sure the car is spotless and covered in hundreds of tiny ‘reference stickers’. The setting became more ‘laboratory’ than ‘workshop’ with our subject looking more like the lead character in a sci-fi movie than a 1960s style icon.
The process began with a photogrammetry set up followed by scanning by a single-bandwidth blue-light projector, which passed a print pattern across the surface, looking at the contrast between the blue and the black lines. The software worked by looking at how the light lines passed across the surface in relation to the reference points stuck over the car’s surface.

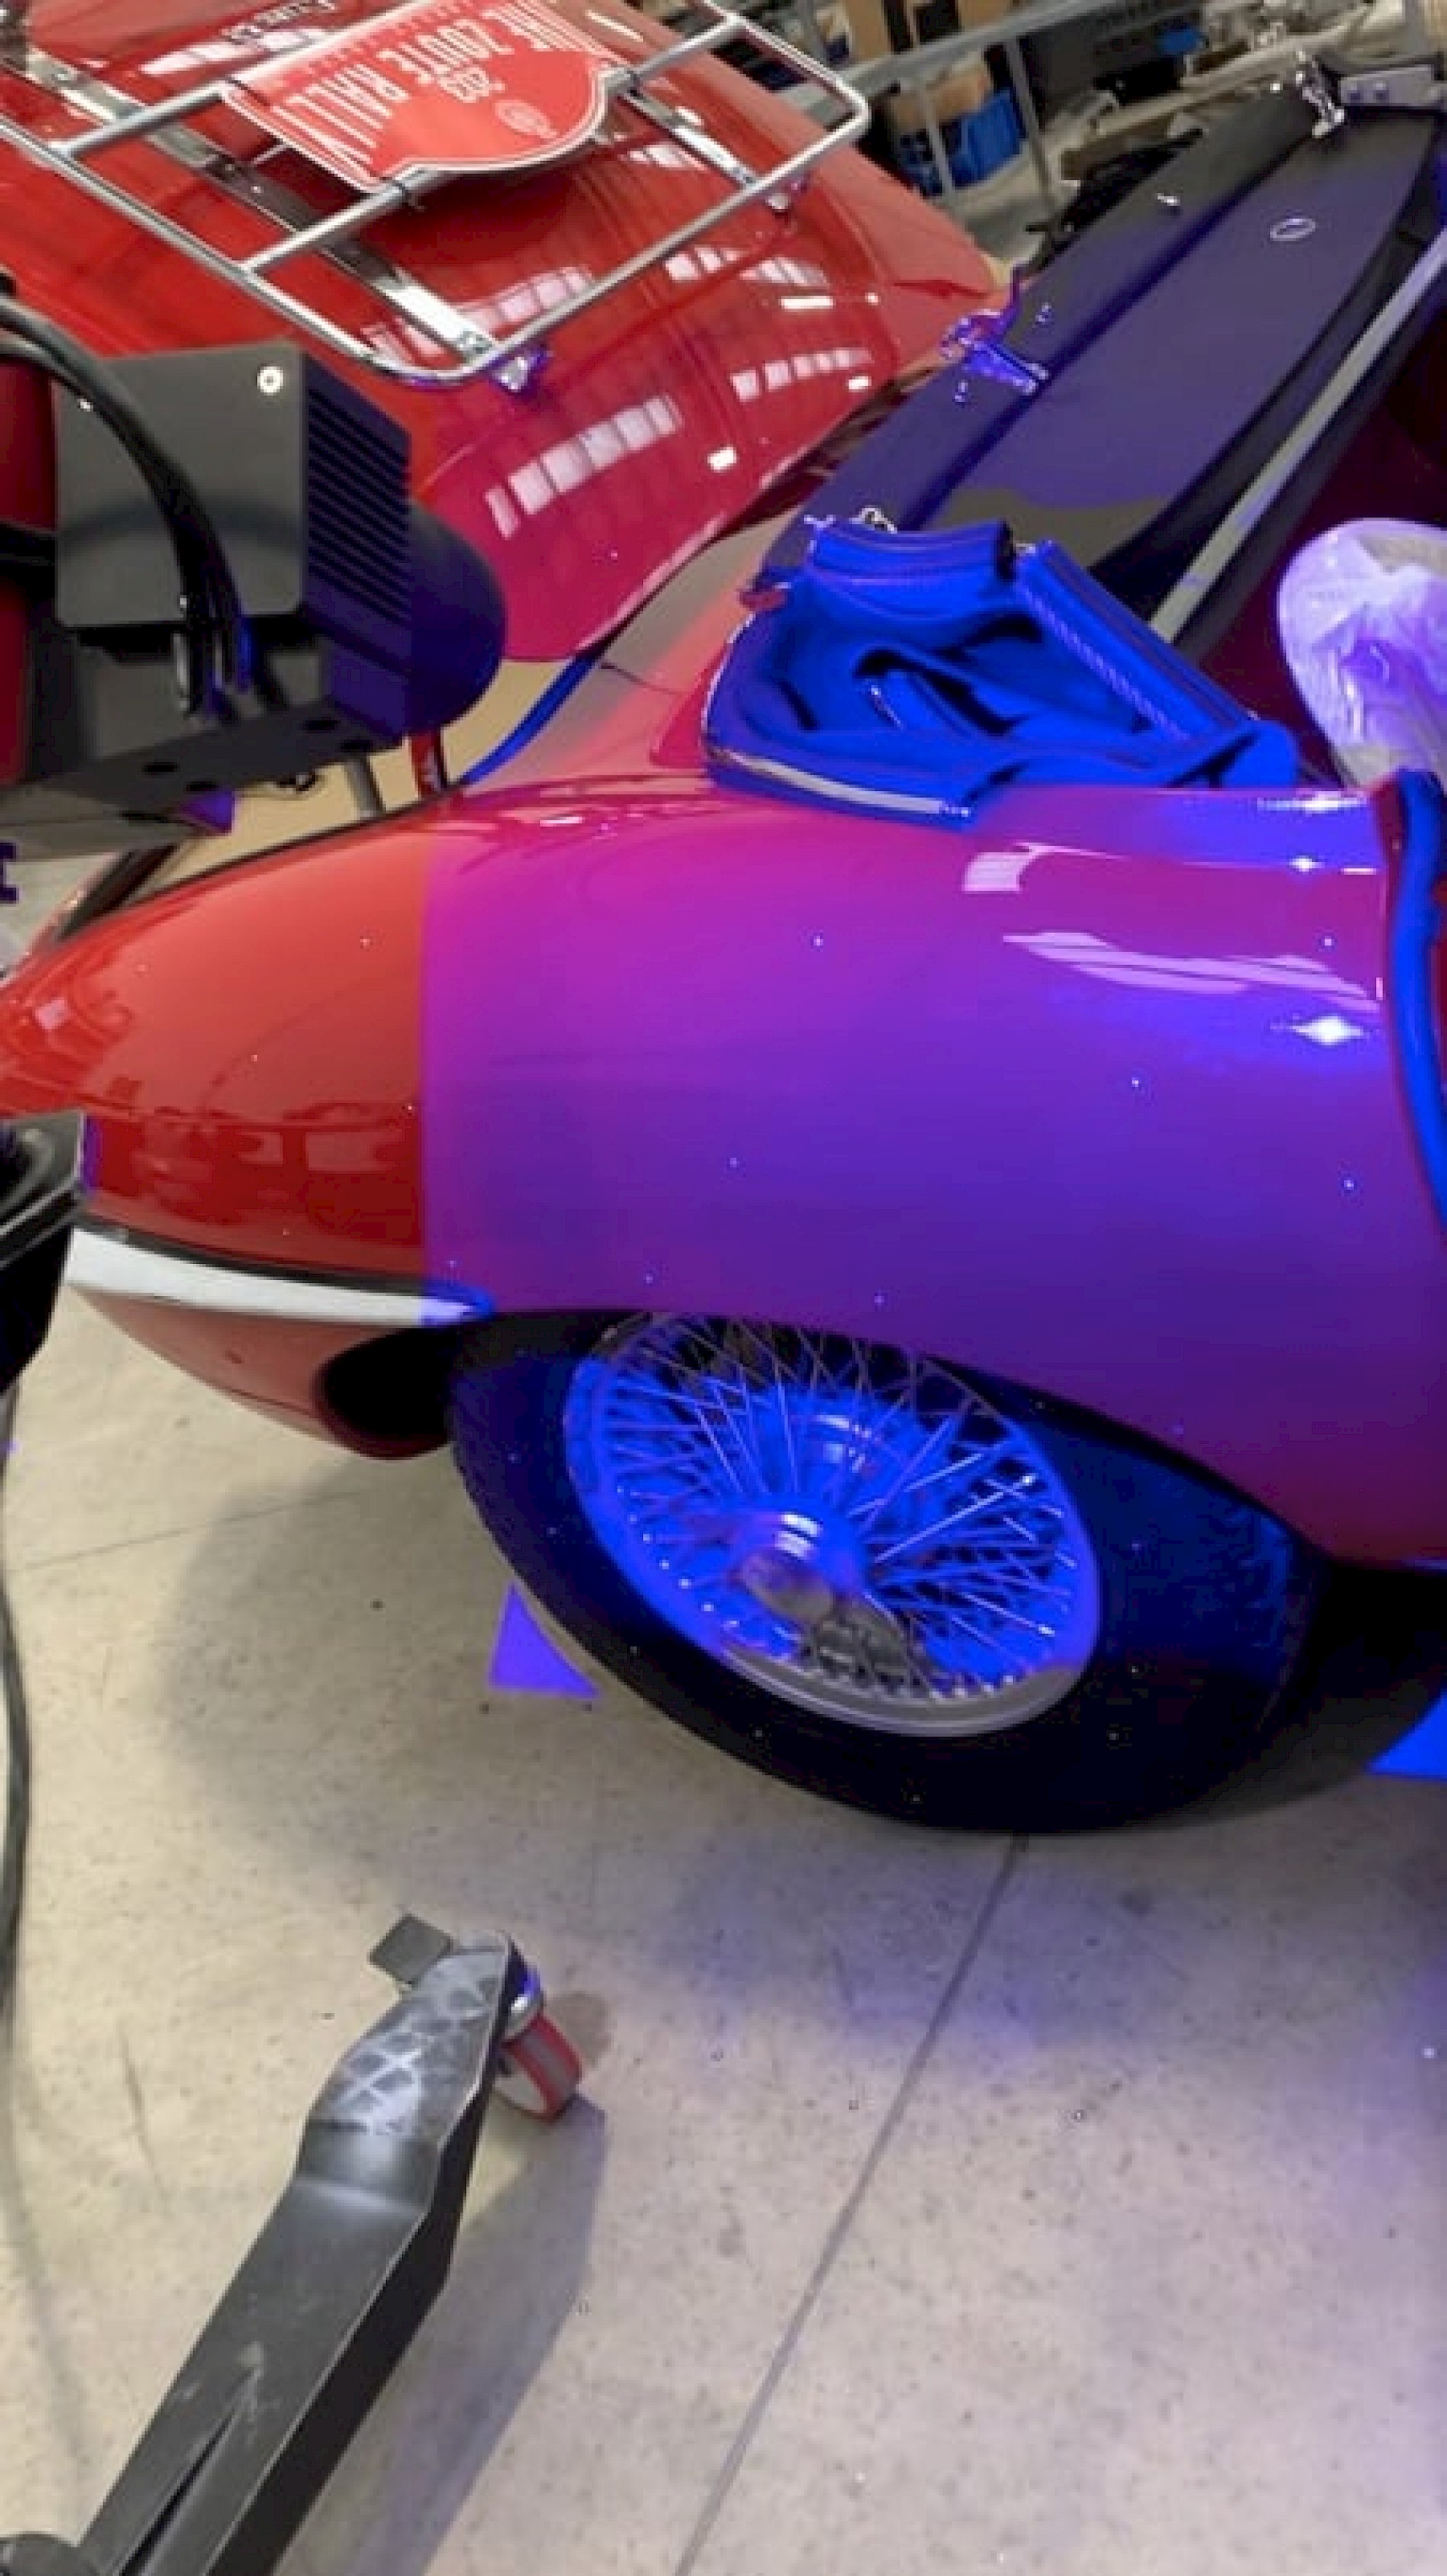
The blue light is projected on to the body of the Jaguar E-type
Red paint with blue light can be tricky to scan but luckily the Jaguar’s paint work was manageable, otherwise it would have had to have been sprayed or polished to prevent reflection which we didn’t want to do due to the value of the car being even more than the value of the equipment – the less we touched the less chance of damage!
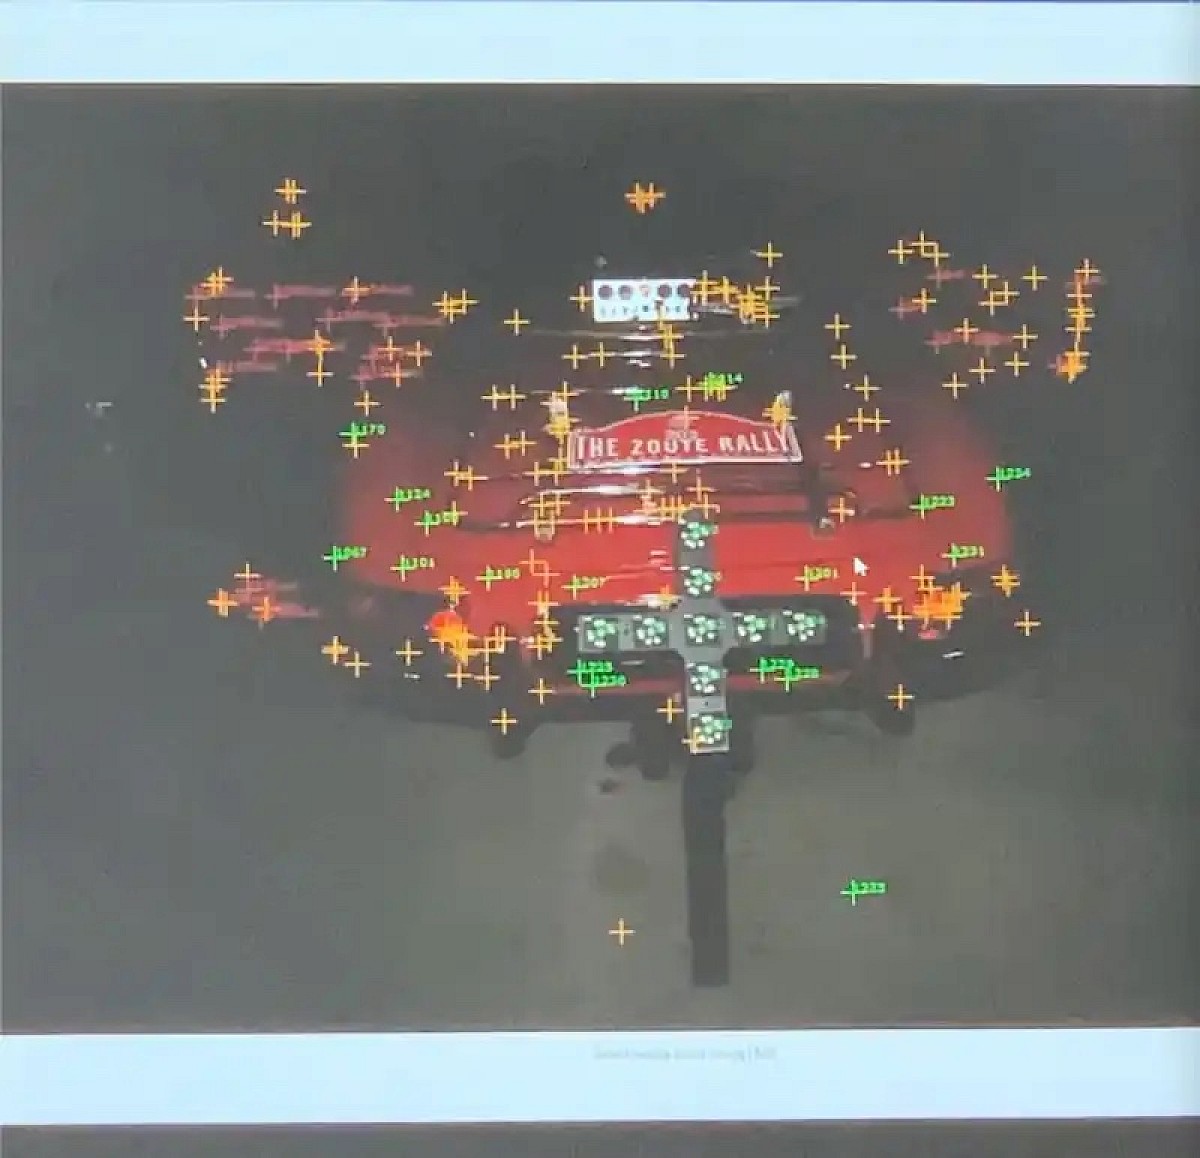
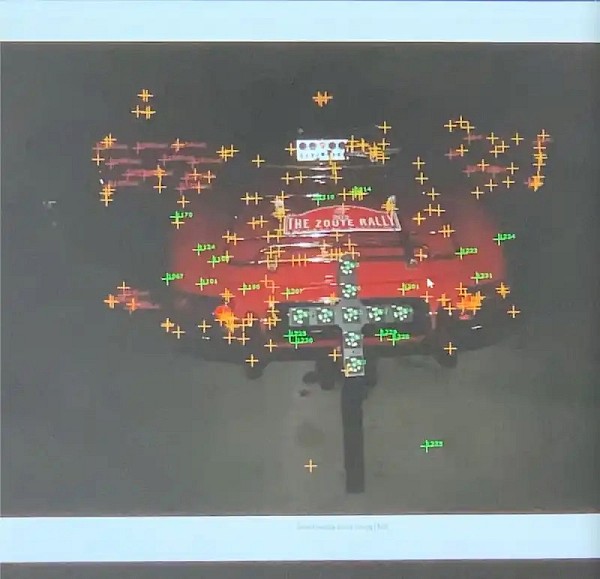
In the set up stage, the points are un-coded so have no reference to anything. This can be seen in the following image, the points appearing as green dots on the computer screen.
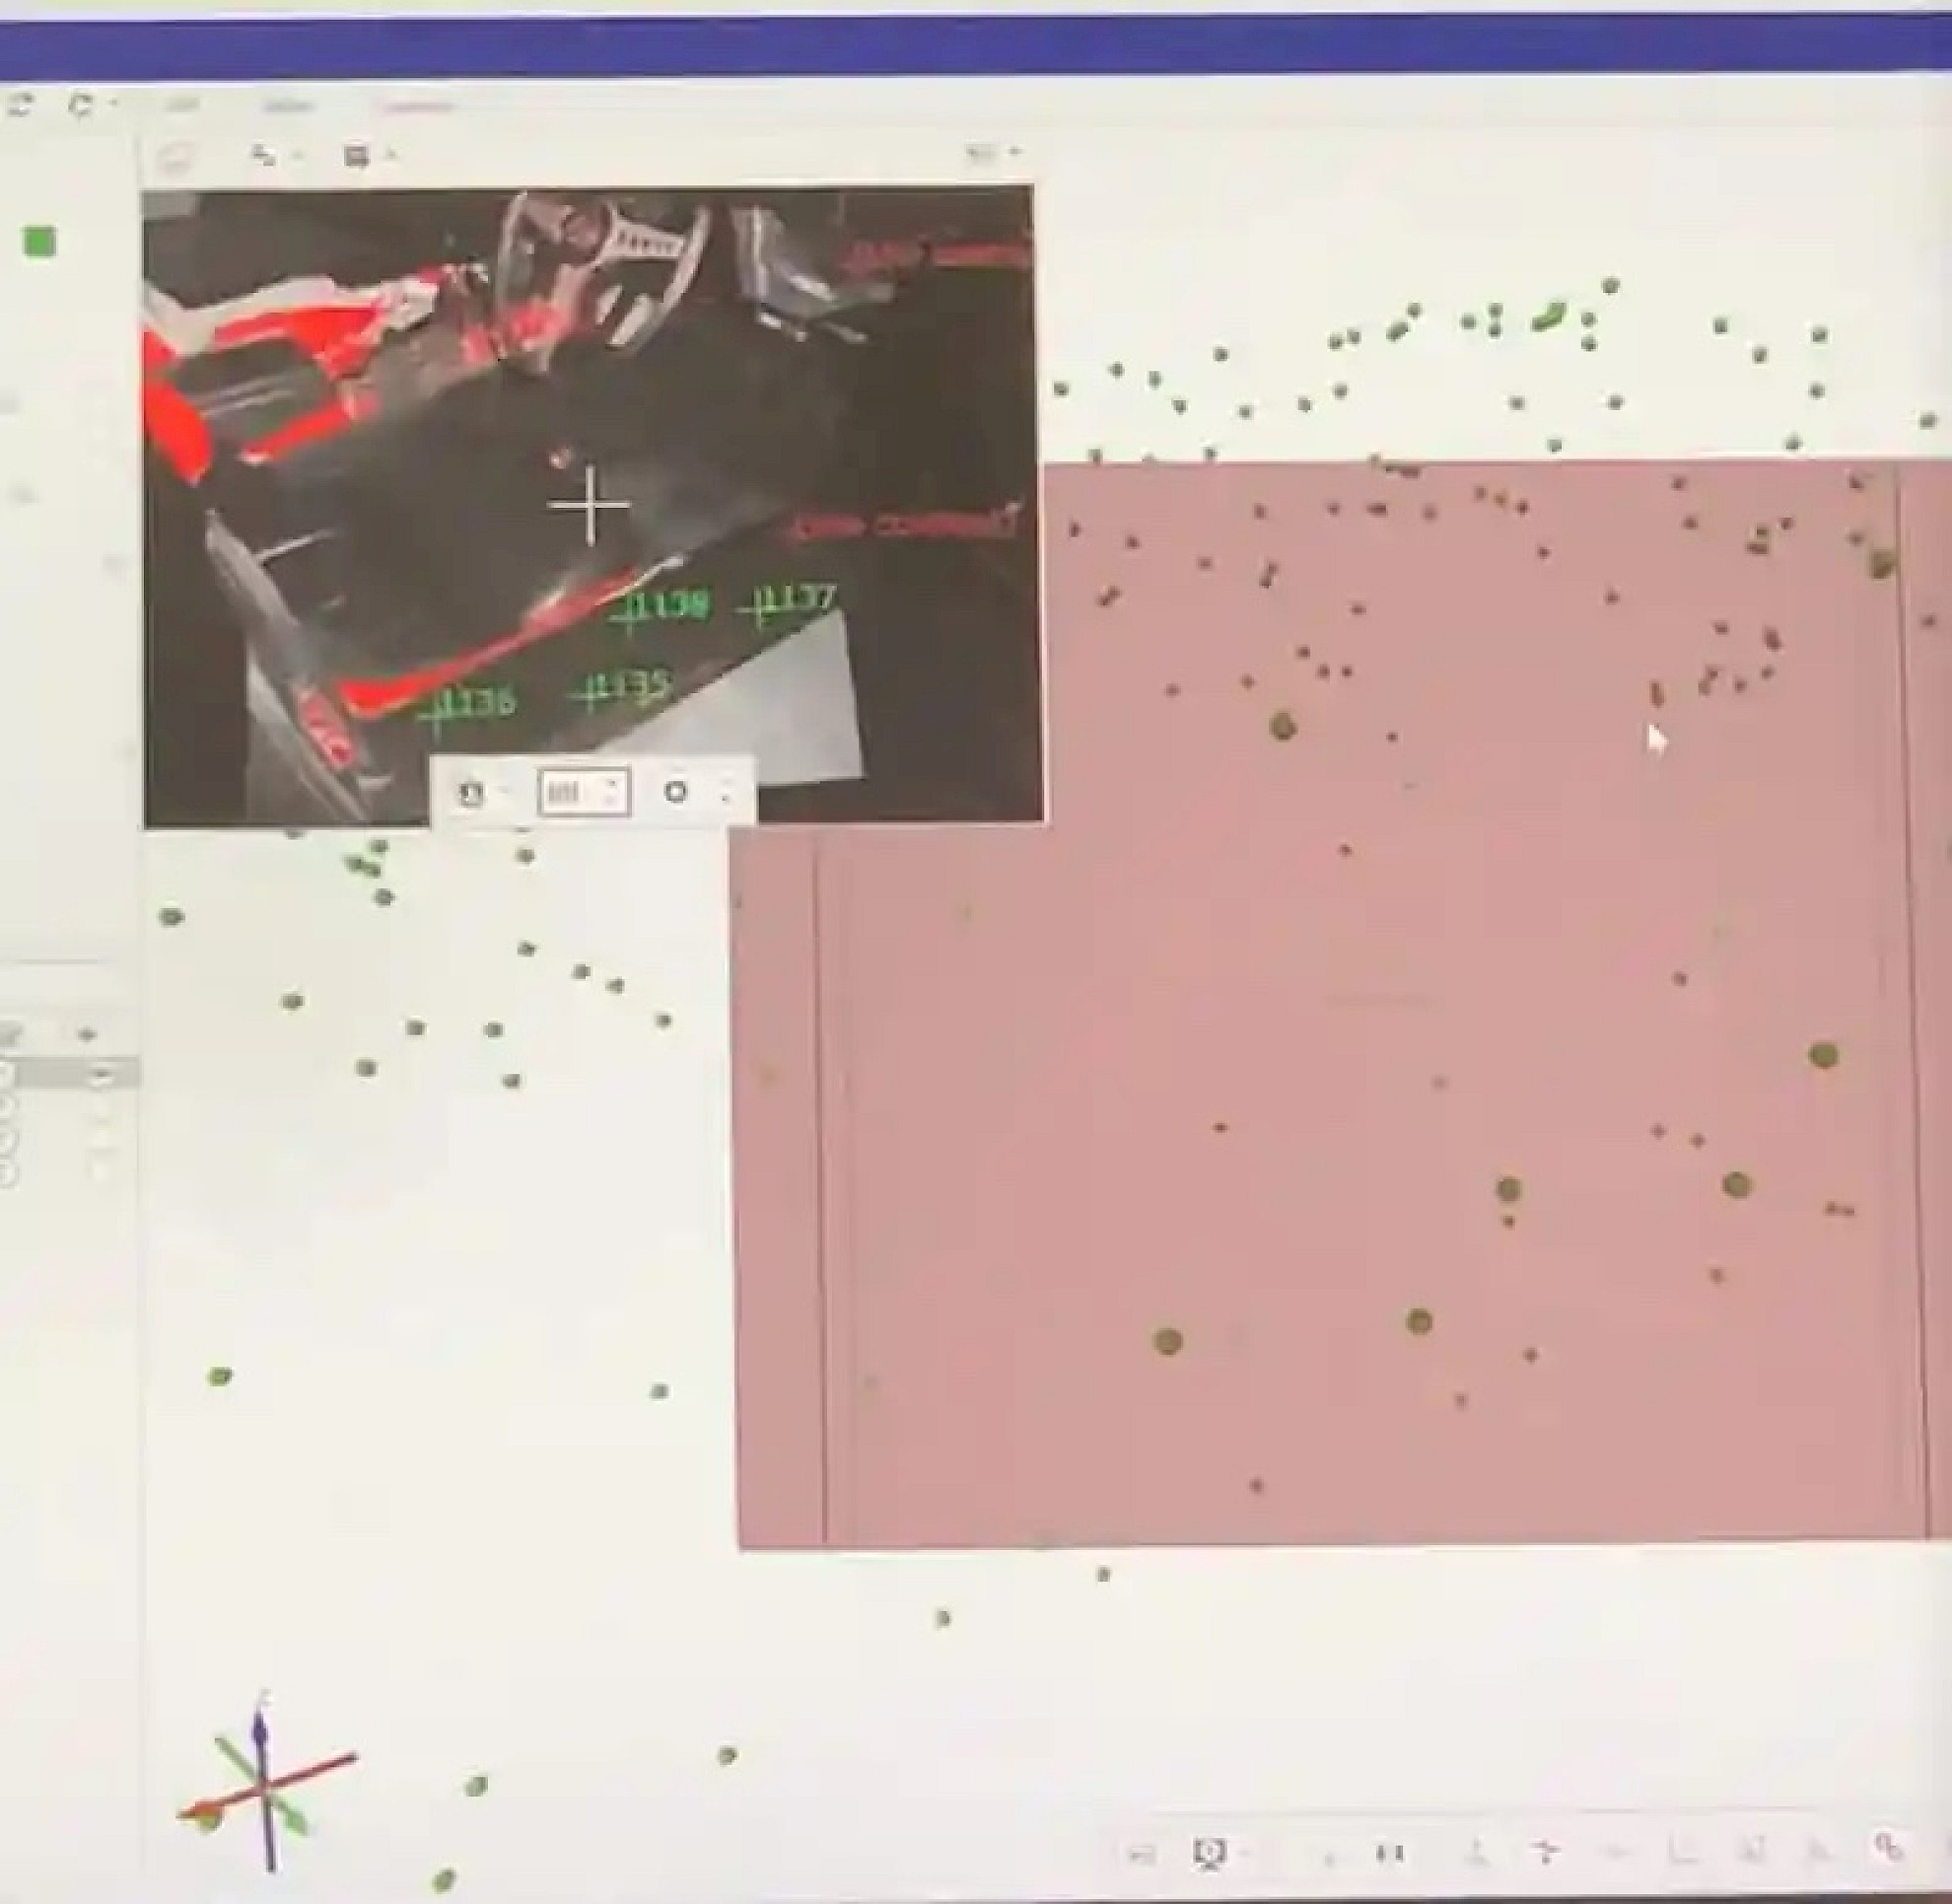
Reference points captured from the points stuck to the Jaguar
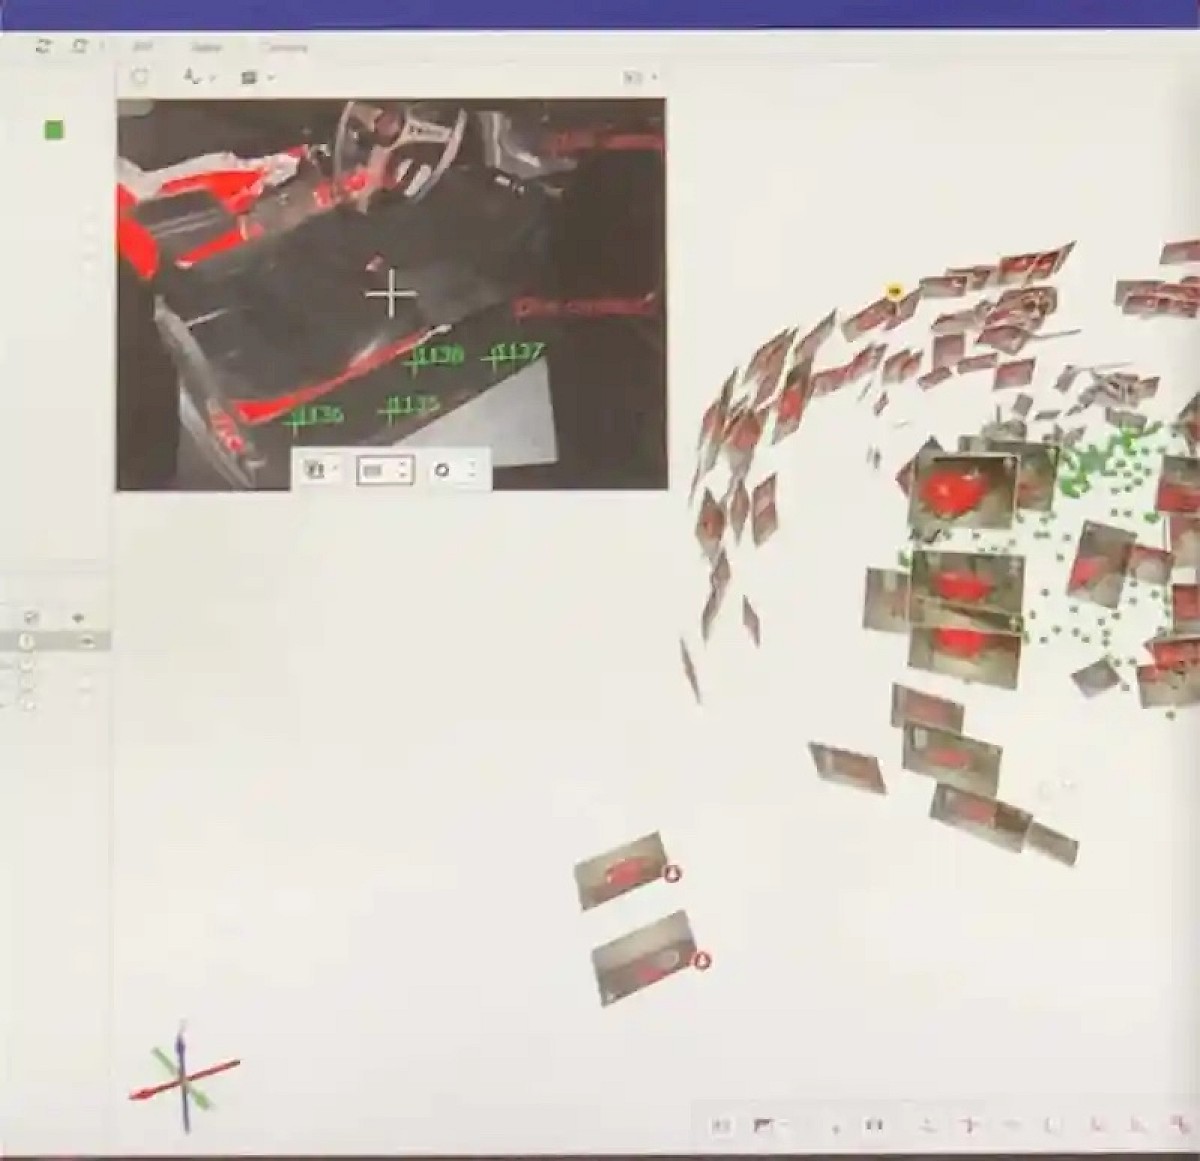
Using a DSLR camera many photos were taken, and a system of optical barcodes were used to create a hemisphere of photos ‘around’ the car. This is the all-important photogrammtery set up stage.
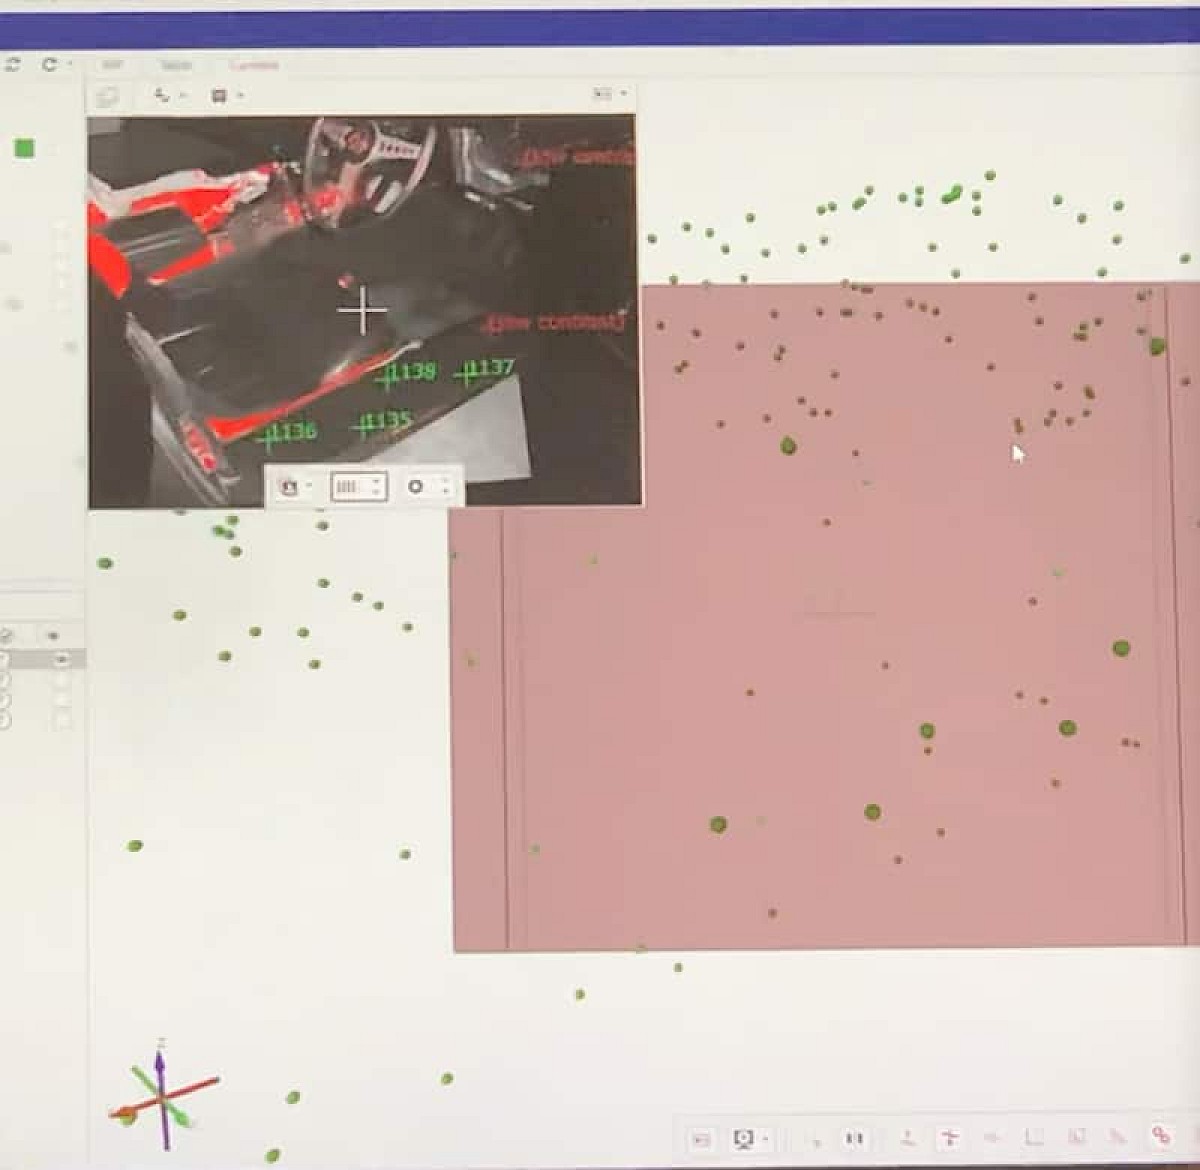
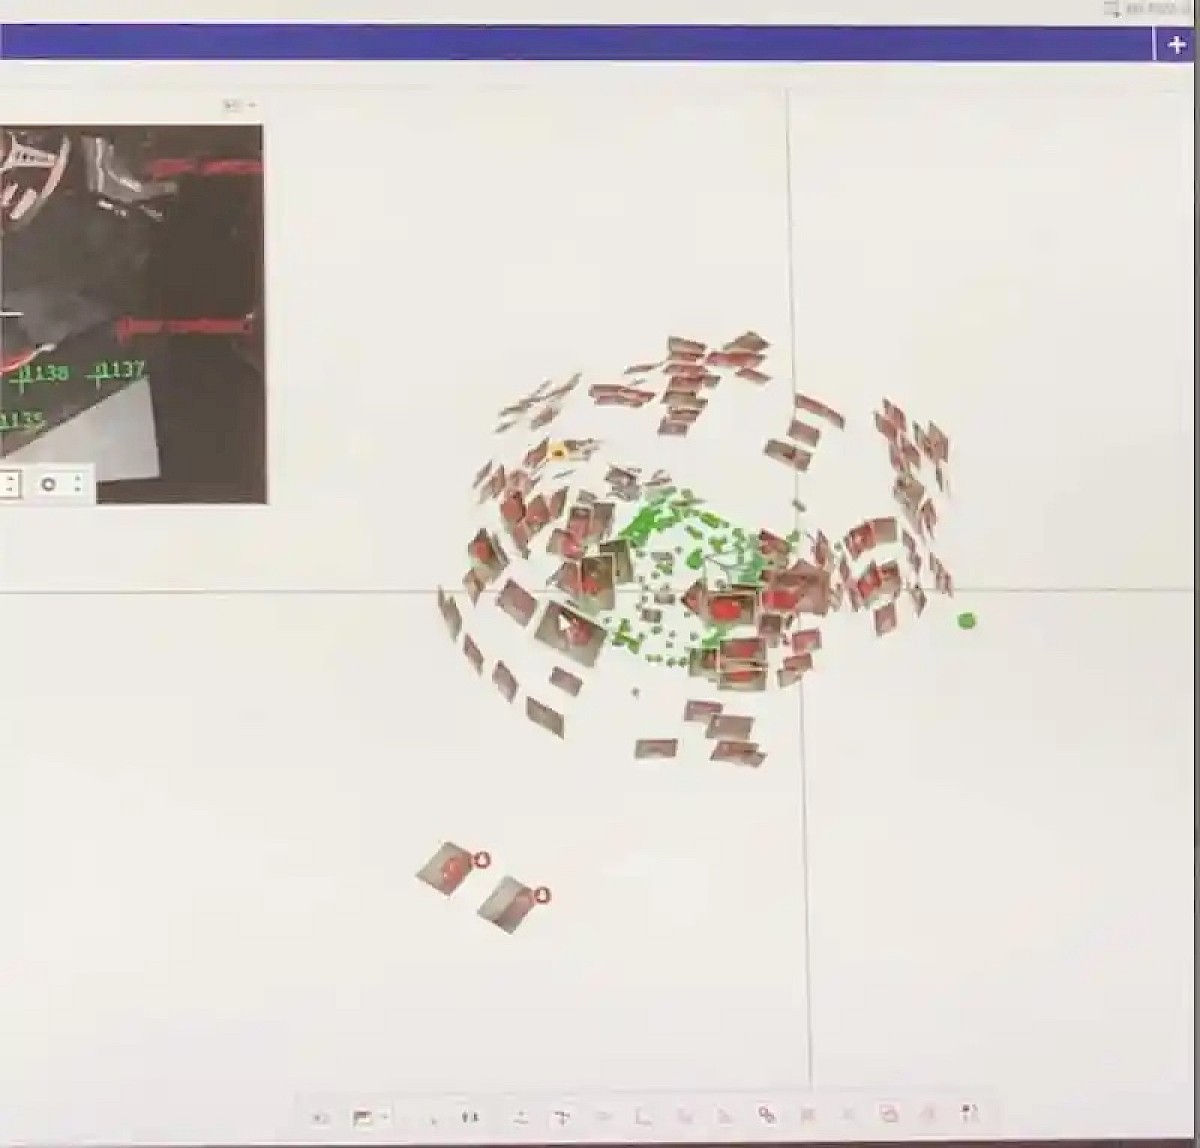


The system then triangulated every one of the green points, giving it a unique code. The large cross with nine images on it in the images below, contained some of the ‘known positions’ that the computer used to triangulate the coordinates of the ‘unknown’ points.

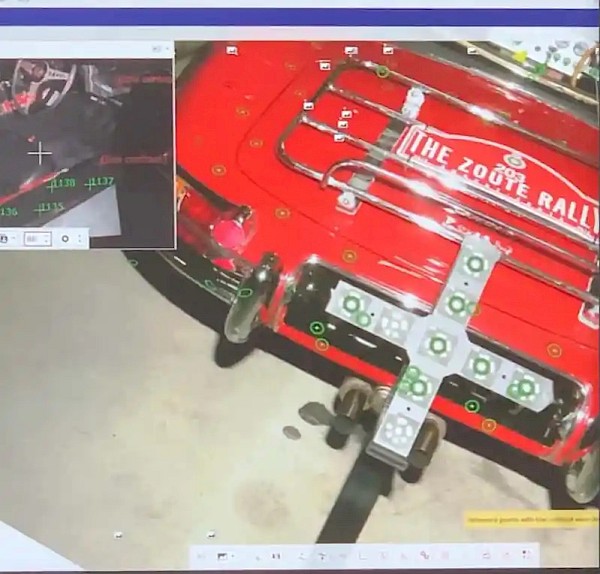
Once all the locations had been triangulated, the scanner was then able to go around the vehicle and scan the surface. Each scan required the scanner to be located in such a way that it could see a minimum of three locations to enable triangulation. This triangulation created a completely unique view to any other triangulation and so the computer could gradually build up many scans of the surface to slowly build a 3D image of the car.
This scanning system combined with photogrammetry locks each point in 3D-space. Any point that has an error of more than 50 microns will create an error message. Such a high level of accuracy is the major difference to lesser systems, such as handy scanners, which don’t use a reference marker system or photogrammetry. For example, over a 3.5 m surface and a tolerance of 20 microns per scan, a handy scanner would compound the deviation and could lead to a 3mm error, which doesn’t sound much, but, using the combined equipment available to us only generates a deviance of 23 microns, or, 0.023 mm, or put another way, a thousand times more accurate. Which when you need everything to fit together on a relatively small scale is quite important!
The polygon model created from all these points and scans were then sent to a separate team to reverse-engineer, resulting in a prototype of our 1:8 scale Jaguar E-type Roadster model.

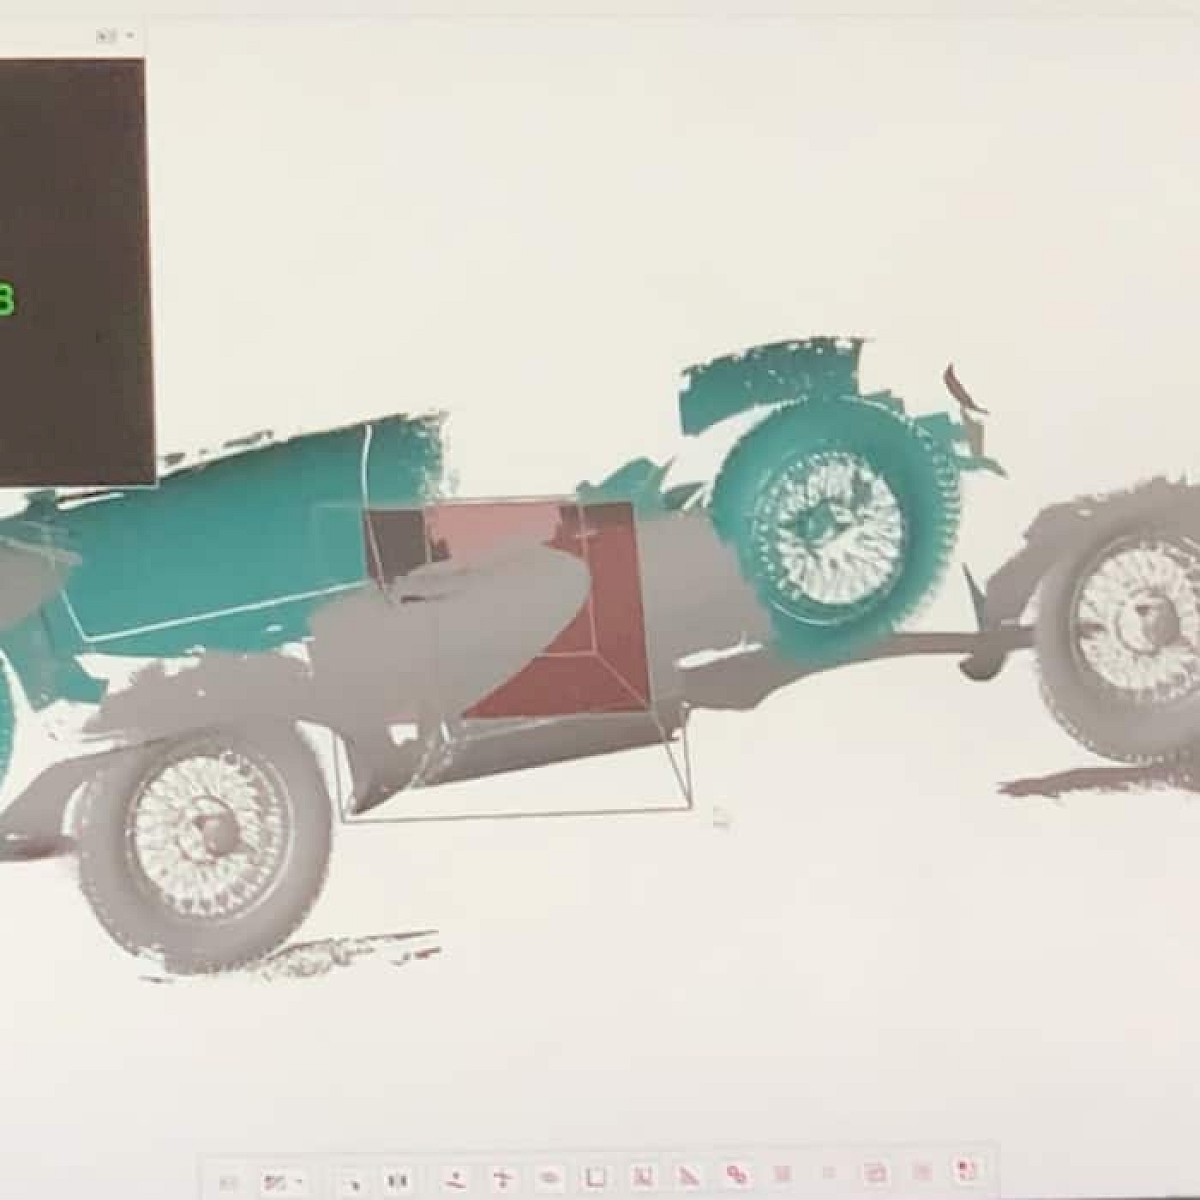
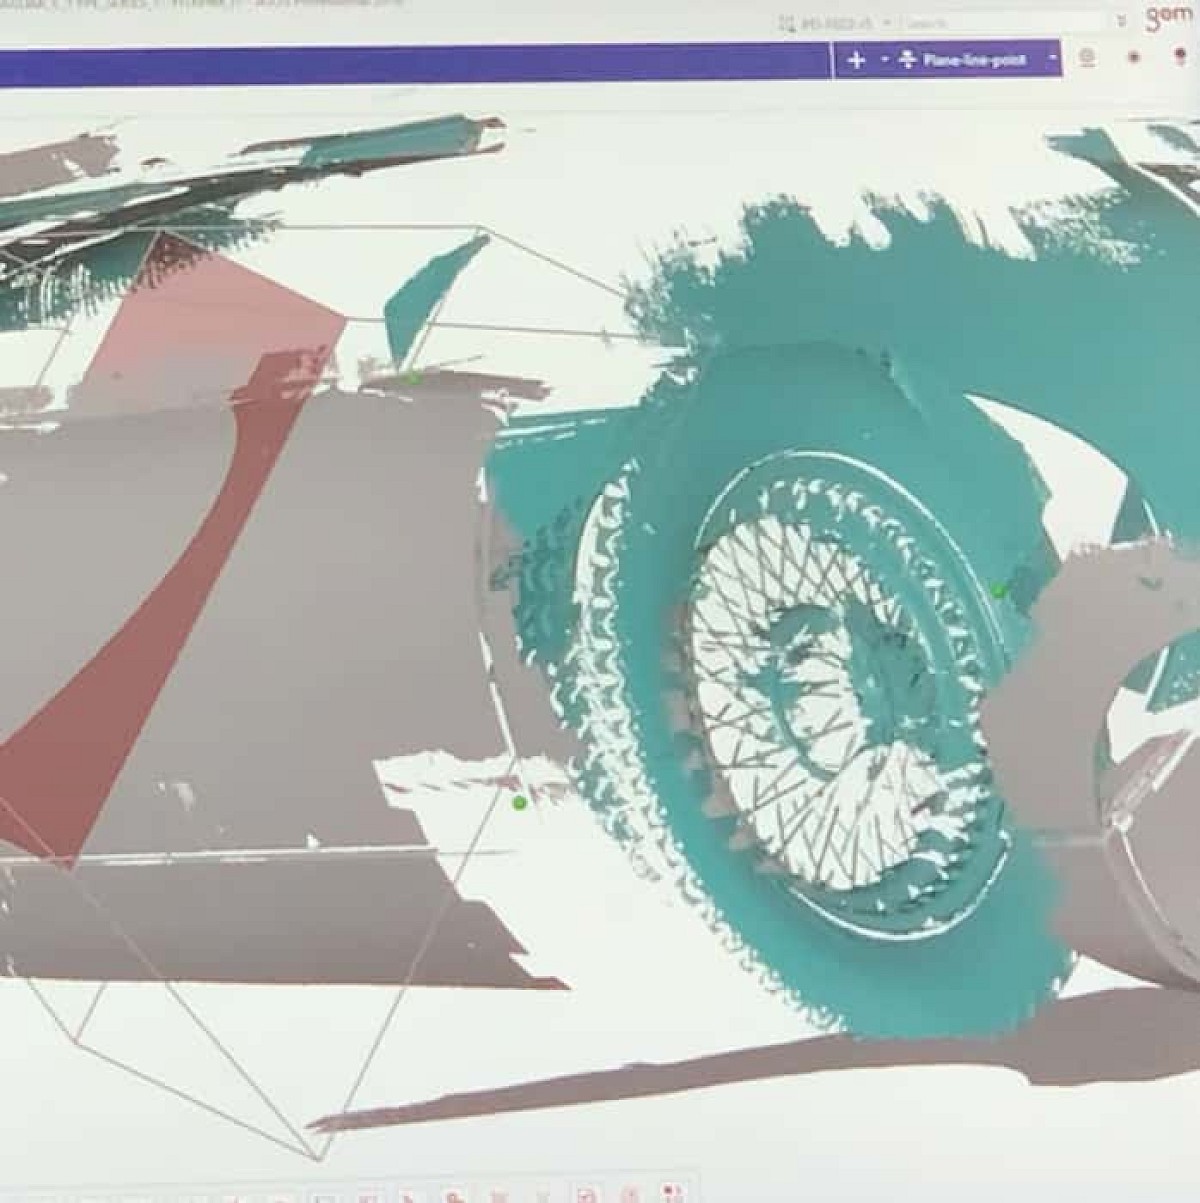
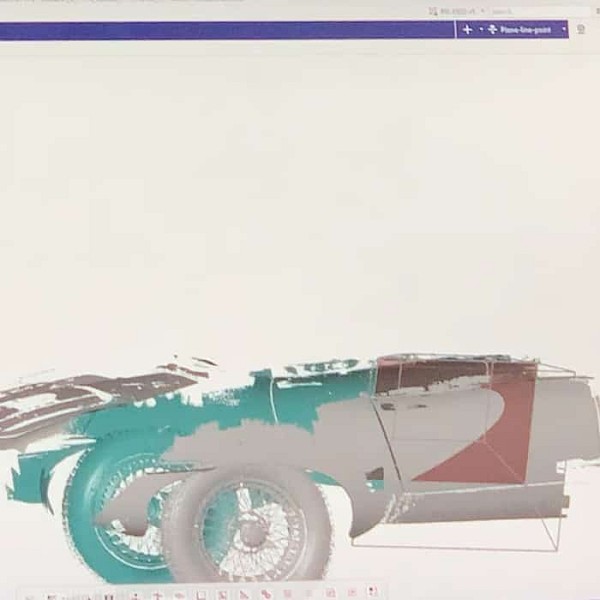


Partial polygon renders from the original scanned E-type